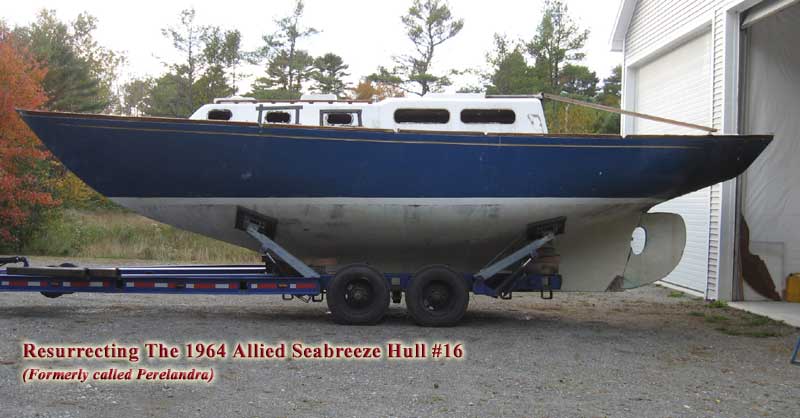
Project Log: Saturday,
April 3, 2010
Home Page >
The Project >
Project Logs > 4/3/10 |
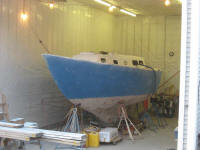
To prepare the boat for the
upcoming repairs in the stern quarters, I wanted to
thoroughly clean the entire boat--and shop--to rid all the
surfaces of residual fiberglass dust. In the shop and
near the boat were a number of odd pieces and parts from the
demolition, which I'd set aside in order to remove a piece
of bronze hardware that I wanted to save, or some such.
I'd also saved portions of the original cockpit lockers and
their gutters for use as a guideline when the time came to
reconstruct the cockpit.
During a few free moments
during an otherwise very busy past several weeks, I'd
managed to rid the shop of these pieces, removing the
hardware I wanted, storing the cockpit pieces outside in my
"saved junk" pile, and bringing other things up to the shop
attic for storage. This helped my attitude, if not
being of any particular assistance to the progress of the
project as a whole.
This was all leading up to a
requirement to rinse the boat down, inside and out.
I'd done this once before, much earlier in the process, but
had since done a lot more grinding and demolition inside the
hull, and although I'd swept and vacuumed, only a rinse-down
would really clean the boat adequately at this point.
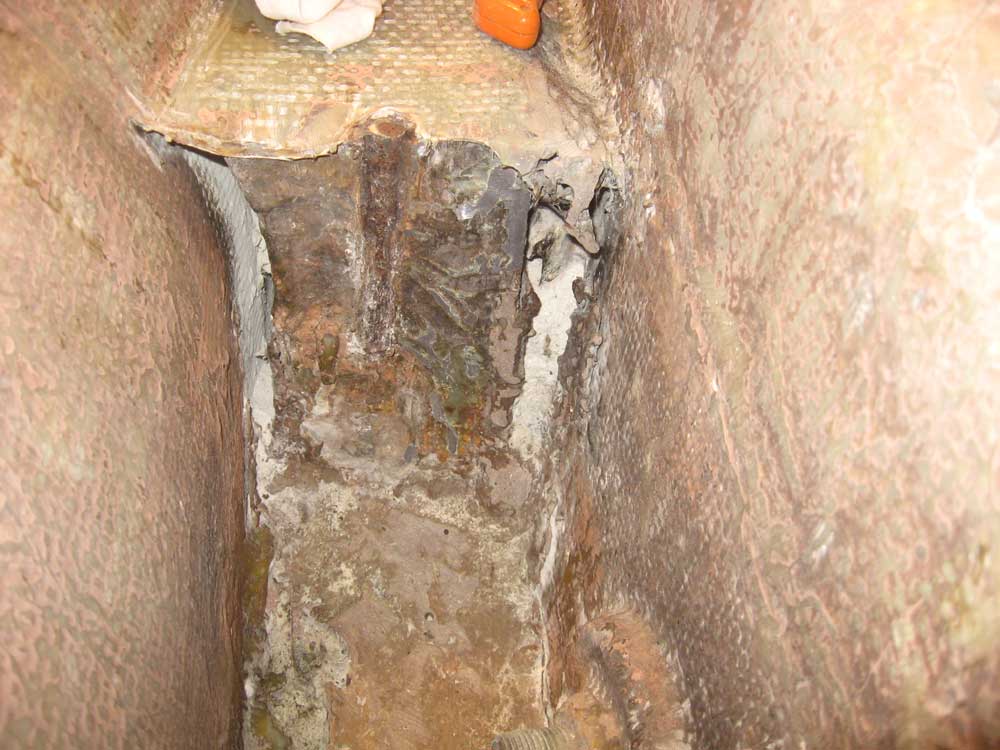
Before I could do that, however, I wanted to address the
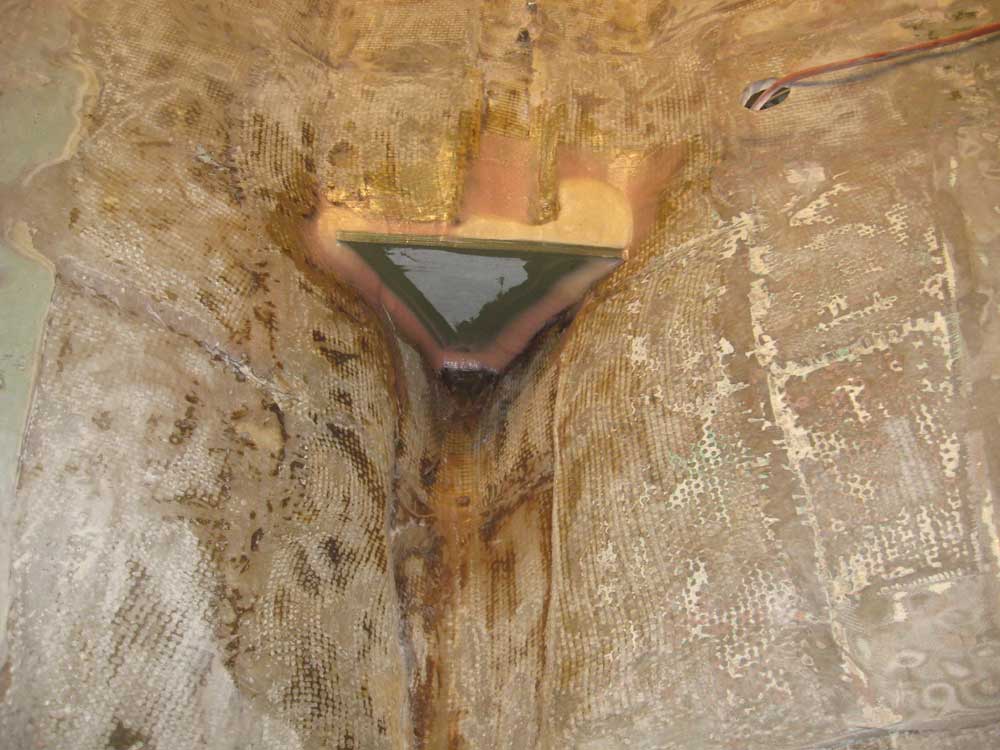
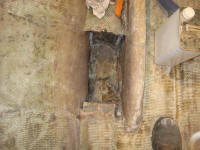
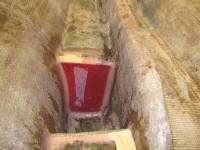
bilge area. The Seabreeze, a centerboard boat,
features a smallish well in the ballast cavity, which allows
access to the centerboard's pivot pin. This well
was a horror of rough fiberglass, raw, exposed lead ballast
at the ends of the large internal pigs, and unsealed
openings through which water and debris could flow--sort of.
These photos show the condition of the centerboard pin well.
The exposed ends of the ballast pigs, and the voids
surrounding them, are clearly visible.
|

 |
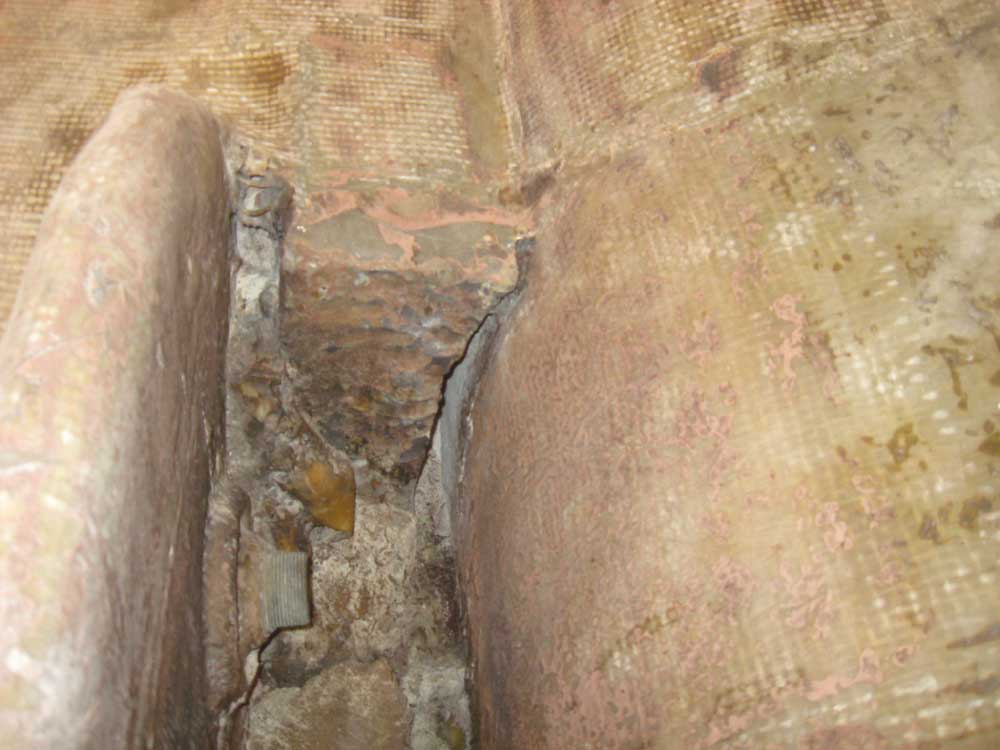
During earlier steps, and when the boat first came
into the shop, there'd been a rather constant battle with
water seeping from (at the earliest stages) hidden sections
of the boat forward of the centerboard pin well. There
was a partial passage for the water along the outside of the
forward section of ballast pig, which slowly allowed water
to drain from cavities forward of the end of the ballast, up
beneath where the head and forward cabin had been.
These weren't well-designed limber passages; rather, the
water just found its way through sloppy voids in and around
the edges of the lead, where it really shouldn't have been.
After all the interior removal, including the final
removal of the cabin sole, I'd finally exposed all the areas
in question, and during these months the interior of the
boat had completely dried. Going forward, I wanted to
prevent water from getting in these areas--including water
from a simple washdown, which would then take weeks to
trickle out and dry.
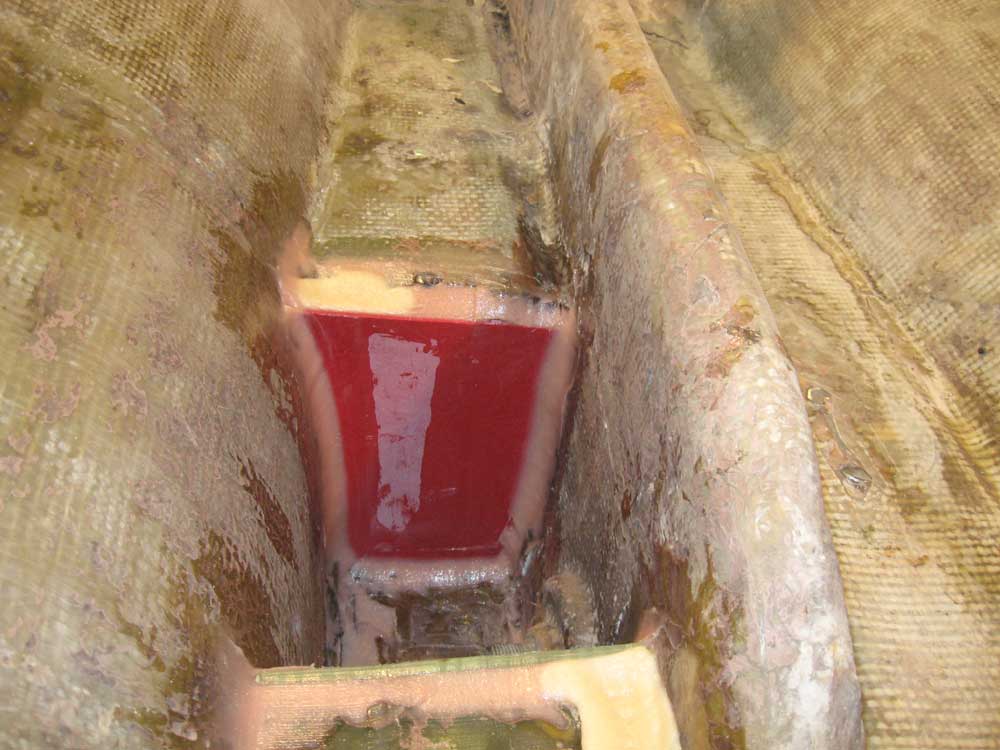
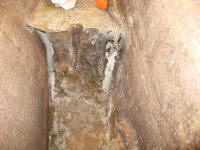
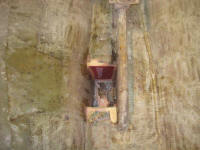
This photo shows the forward end
of the ballast pig, roughly beneath where the longitudinal
centerline bulkhead that had defined the head compartment
was in the original interior. |
 |
Therefore, in order to clean the boat I first had to
do whatever I wanted to do to better these areas--a
milestone of sorts, since I'd be adding the first new
material of the project. I believe that a good boat
starts with a clean bilge, one that can be easily
maintained. Therefore, I'd have to start by cleaning
up and smoothing the contours of these areas, lest they
become once more the dank, debris-filled holes that they'd
been. Sealing off the unwanted water passages was also
of key requirement to me.
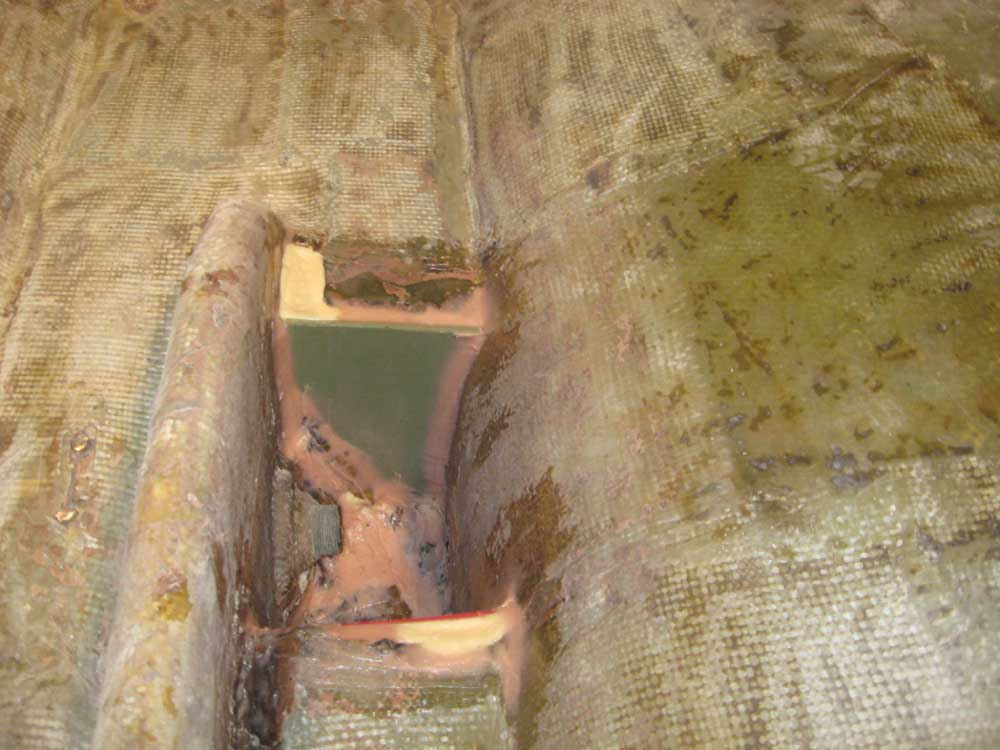
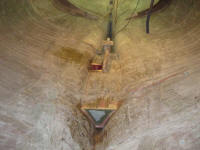
After thoroughly vacuuming
and solvent-washing the areas, I created cardboard templates
of the ends that I wanted to seal--three pieces in all (two
for the centerboard pin well, one for the forward end of the
ballast). I transferred the templated shapes to
leftover pieces of 1/4" and 1/2" prefabricated fiberglass
that I had on hand and, after a test fit, modified the
panels as needed to fit appropriately.
I
secured the panels in position with hot-melt glue, since the
nature of the spaces involved meant that the panels couldn't
be a perfect fit, and I didn't want them to wobble around
while I applied epoxy adhesive and fillets. Then,
using several batches of thickened epoxy, I bonded the
panels in place around their edges with broad fillets,
smoothing the contours and filling low spots nearby as
needed. |
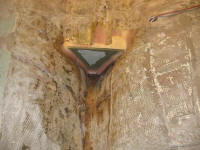 |
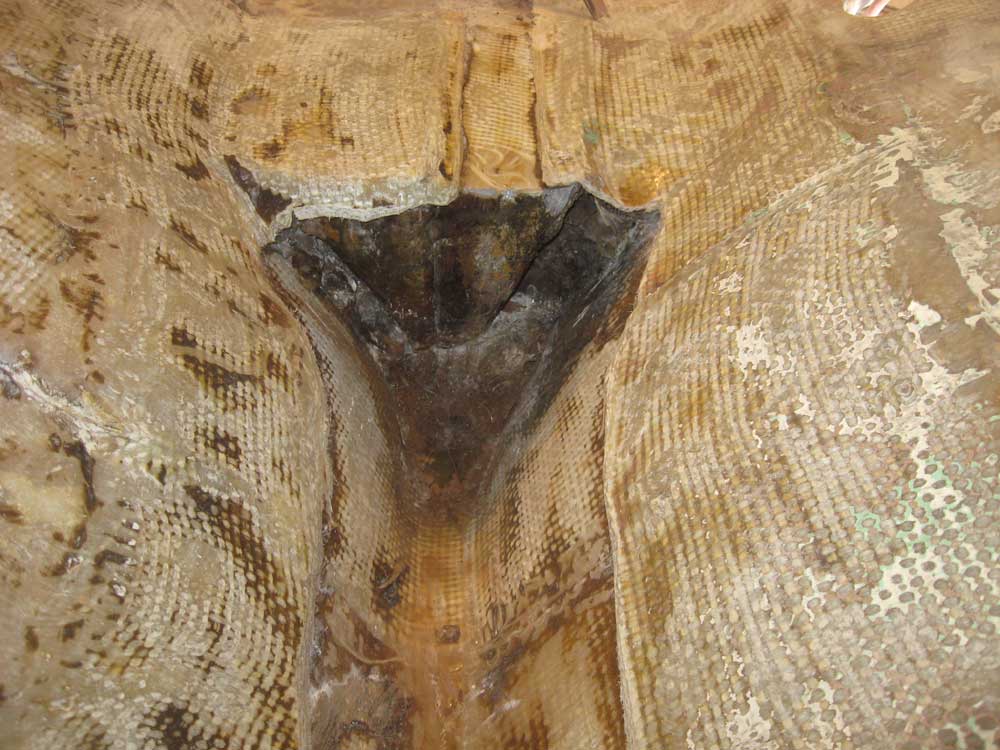
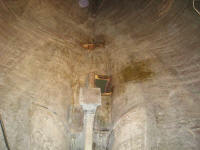
The fill became a bit heavier than I'd intended in a
few areas, causing excess heat from the epoxy's curing
process--the lighter-colored areas seen in these photos.
Normally, I'd take all steps to prevent this, but the heat
didn't hurt anything here, and these panels and fillets
weren't structural--simply a cleanup and waterproofing
measure that wasn't strictly necessary or critical. It
didn't really matter if these fillets were weaker than
needed--which they would indeed be, as overheated epoxy
loses many of its core characteristics. In this case,
the fillets were mainly to hold the panels in place for the
moment, and to provide surfaces on which to apply tabbing
later, since the surrounding edges of the original hull and
adjacent laminates were, to put it mildly, rough.
I'd
later be bonding the panels in place over the fillets with
fiberglass tabbing. I'd hoped to install that now, in
one fell swoop with the fillets, but with the lateness of
the hour (I'd uncharacteristically started this small
project late in the afternoon) and the excess heat in the
fillets, I chose to postpone the tabbing till later. |

 |
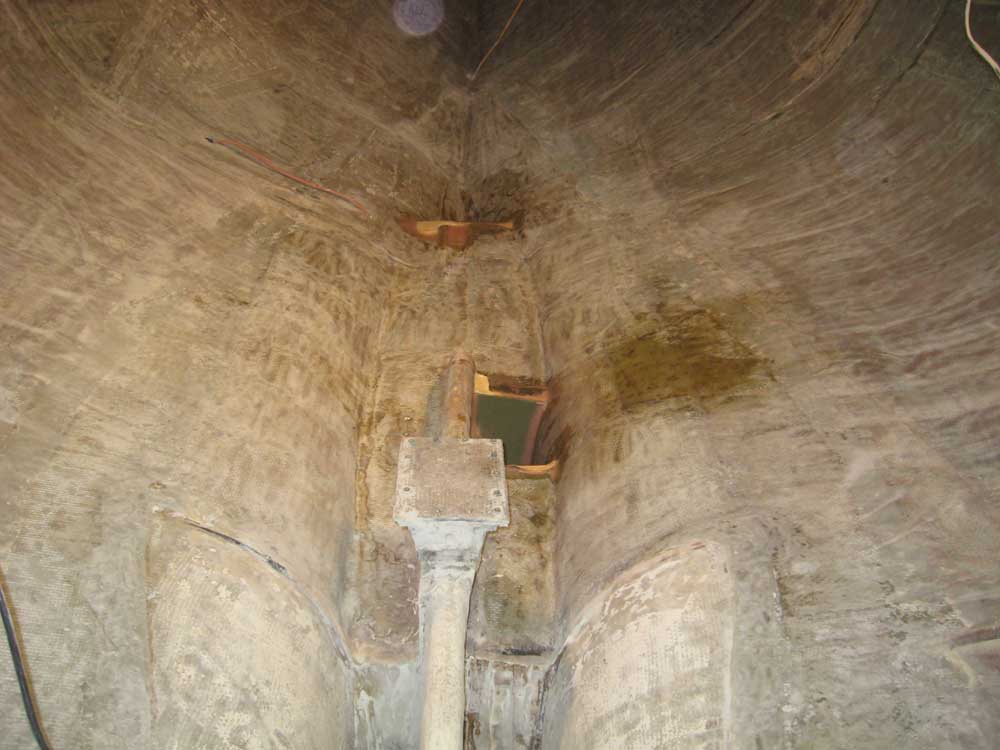
I used some of the leftover epoxy mixture to smooth
out the areas inside the centerboard pin well,
particularly along the forward edge and bottom of the space.
I hoped that these efforts, when all was said and done,
would enable me to keep these areas smooth and easy to
clean. |
 |
In any event, I'd accomplished what I'd hoped to:
seal off the raw ends of the ballast cavities so that I
could rinse the boat out the next day, thereby enabling me
to move forward with the other repair work required. |
 |
Total Time Today: 2.25 hours |
Previous |
Next |
|
|