Project Log: Saturday,
November 21, 2009
Home Page >
The Project >
Project Logs > 11/21/09 |
The day started out annoyingly.
Apparently, I wasn't really in the mood, or maybe I was
growing weary of dust and grinding and cutting and
mess--hard to imagine, but there you are.
In any
event, my task for the day was the lazarette: the
final area of the boat requiring substantive grinding and
additional demolition. I'd not been looking forward to
it, and only the idea of getting it done gave me the
motivation to press on. I knew access would be as
tight as anywhere on the boat, and that the task would be
dirty and unpleasant.
My old box fan seemed
disinclined to work. Normally, once it gets filled
with dust and stops working, a thorough cleaning with
compressed air does the trick; not so today. Perhaps
this ancient fan of indeterminate origin and age had finally
given up for good. I set it aside for now.
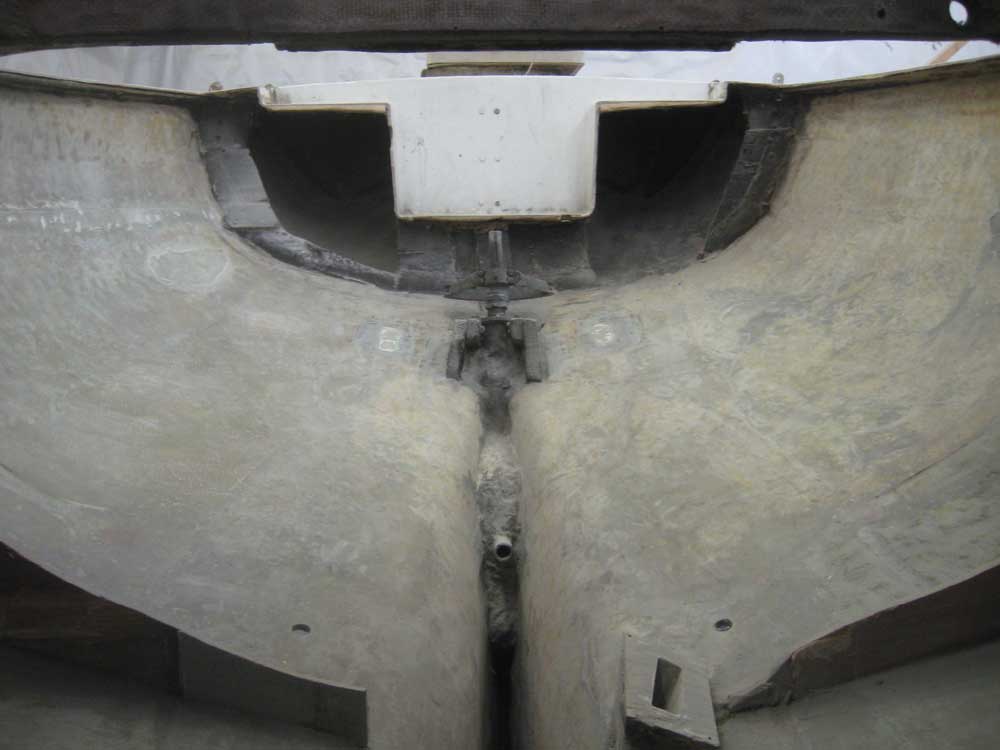
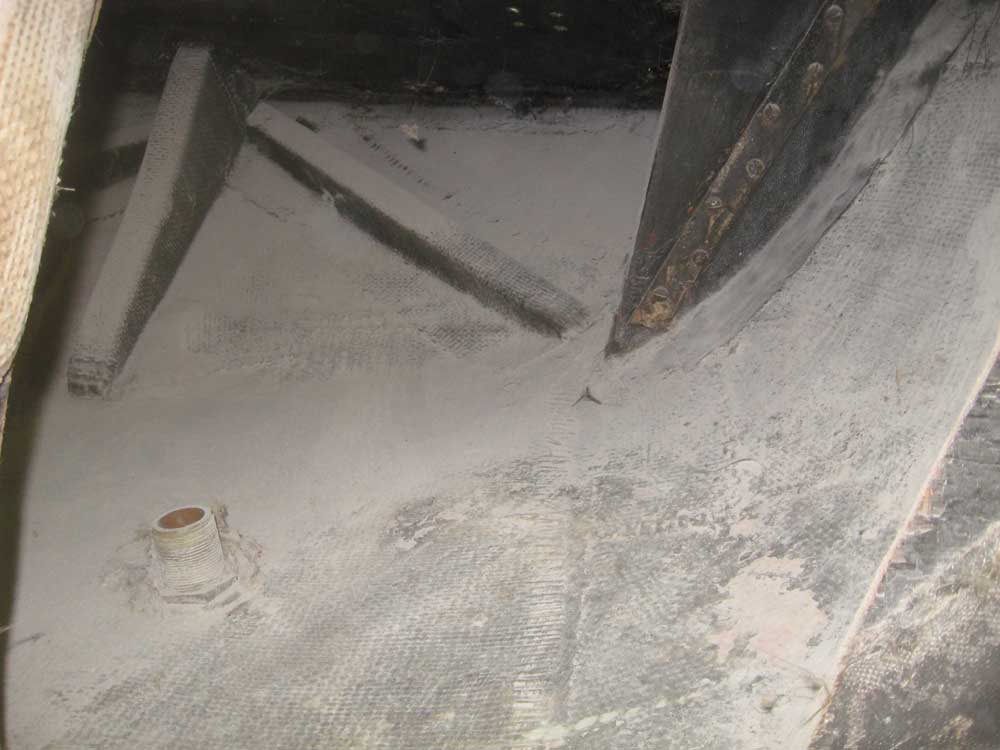
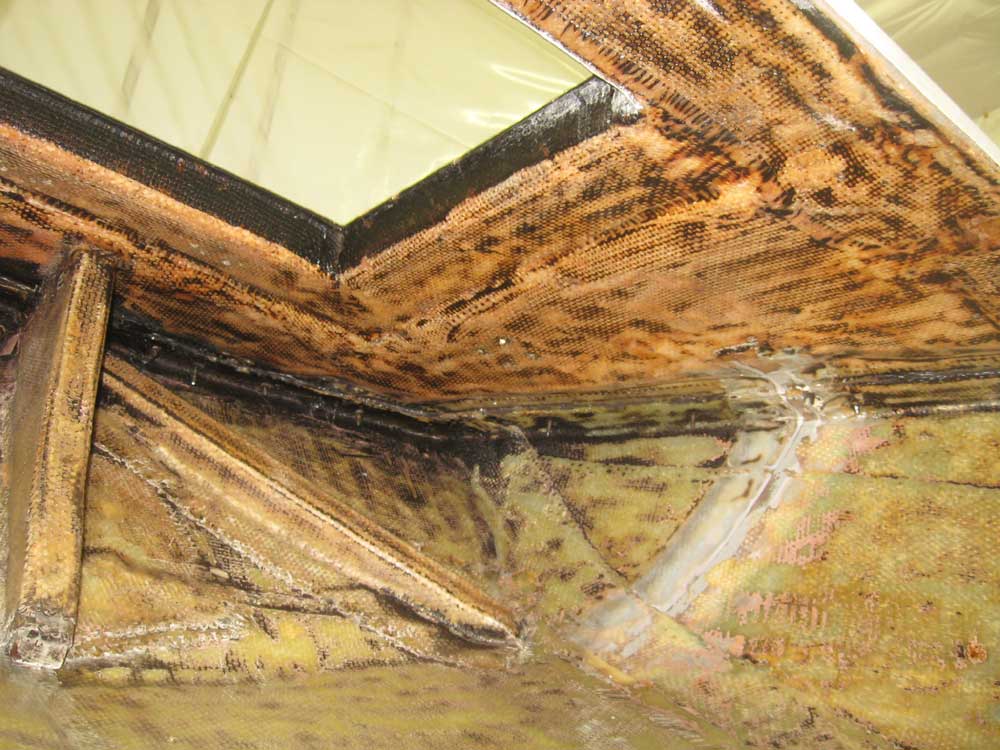
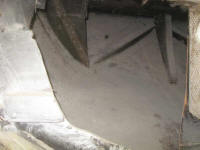
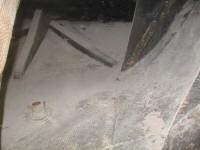
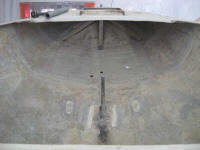
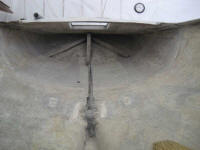
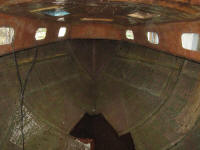
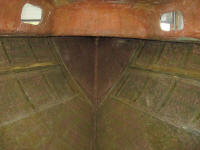
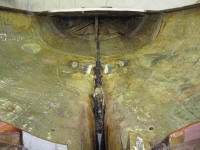
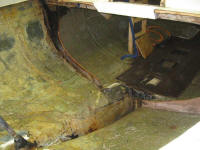
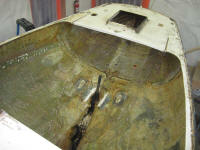
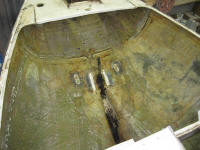
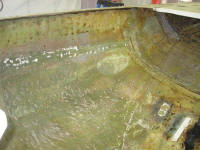
Note that the beginning
portions of this log are short on photos and long on
description, with the only photos showing the ultimate end
result of the day's efforts; I'd left the camera elsewhere
during the beginning of the day, and once I was geared up
and in the boat with mask and hoses and all that, I was
reluctant to head back down to fetch the camera, so there
are no photos taken during the process. Apologies all
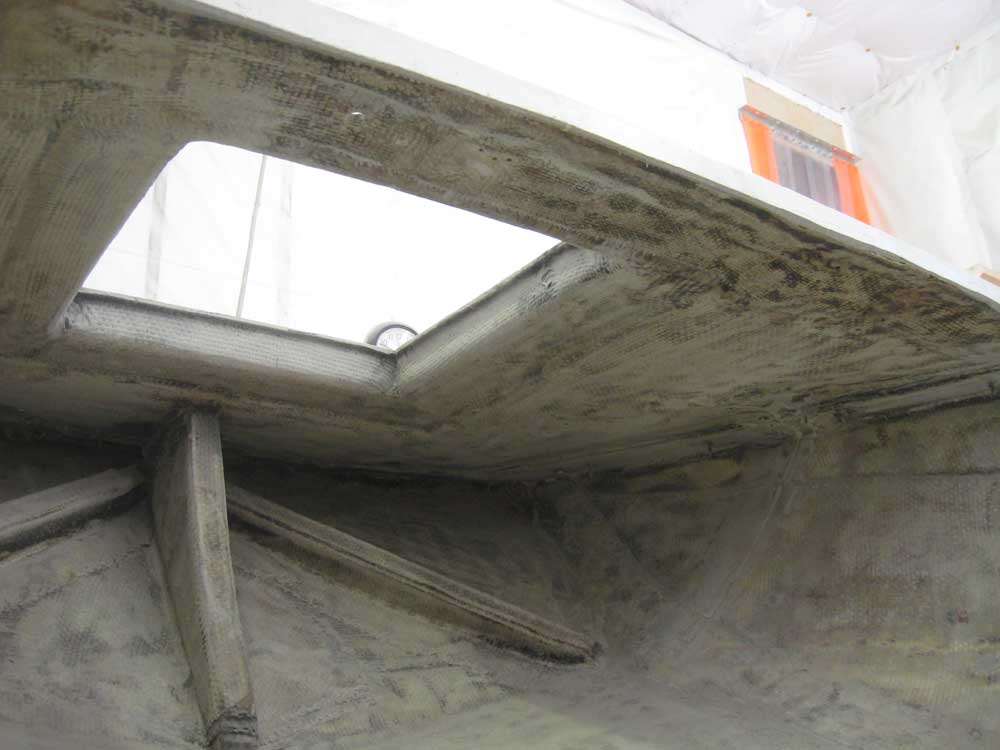
around. Here are some photos, taken last week, that
show what I started with, however. |


 |
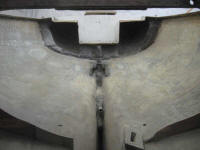
Onwards.
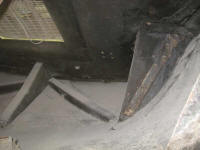
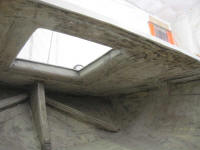
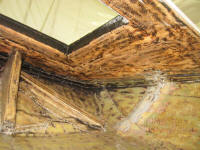
Last week, I'd cut out portions of
the wooden bulkhead that had once separated the lazarette
from the cockpit lockers. So my first job for the day
was to continue that process, having subsequently determined
(without a trace of surprise) that the remainder of the
bulkhead, plus the plywood knees that secured the mizzen
stay and mainmast backstay chainplates were badly charred,
poorly constructed, and generally deteriorated beyond any
hope of salvation.
The four chainplates were bolted
to their respective knees with anywhere from five to 10
bolts each (10 on the backstay chainplates). My first
thought (and this is where things got annoying) was to cut
the knees away from the hull without unbolting the
chainplates, as I hoped to save myself the work. Maybe
I could avoid unbolting if I could cut the knee away and
pull the chainplate out from beneath, along with its knee.
Unfortunately, I found that I was having trouble cutting
the knees away from their low sides: I couldn't seem
to make the saw go through the wood (and thin fiberglass
tabbing) by pushing up, against gravity. Normally, I'd
start at the top and saw downwards, but I couldn't do that
here because the stainless steel chainplates were in the
way. The steep angles of the hull, tough access, and
angles of the knees themselves meant that I couldn't really
get my angle grinder (equipped with the usual cutoff wheel
for cutting fiberglass) into the spaces to cut the tabbing
and give me any hope of prying the knees out.
After
fighting this annoyance for some time, I gave in to the
inevitability of it all and, with utter calm and equanimity,
proceeded to unbolt the four chainplates. To make this
(and subsequent) parts of the day's work easier, however, I
first decided to cut away more of the bulkhead and remains
of the cockpit. There was no reason to leave most of
this in place, and it really needed to go, not only because
everything was damaged in the first place, but also because
access really would be critical to this rebuild. At
first, I cut in towards centerline, thinking of leaving the
center part of the old cockpit well and the heavy wooden
timber behind (the compression post for the mizzen step) in
place. In short order, however, I recognized that this
was silly, that the post was charred, and that it just all
had to go. So out it came, and with startling ease.
This greatly increased accessibility to the lazarette,
for which I was grateful. I unbolted the chainplates
without too much difficulty; none of the bolts were frozen,
and although the installers had chosen round-head bolts with
slotted (rather than hex) tops, and the fact that one of the
bolts incongruously featured a nut with a different diameter
than all the others, the process went pretty easily.
With the chainplates out of the way, I could more easily cut
away the plywood knees, this time working at the top and
cutting down. Soon, they were gone.
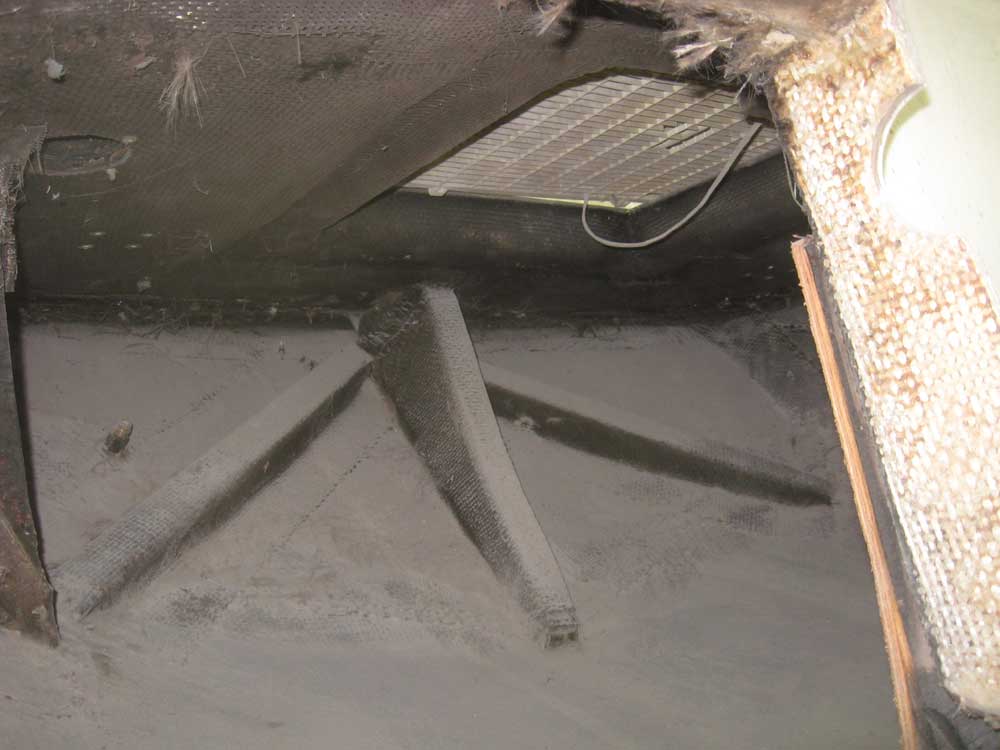
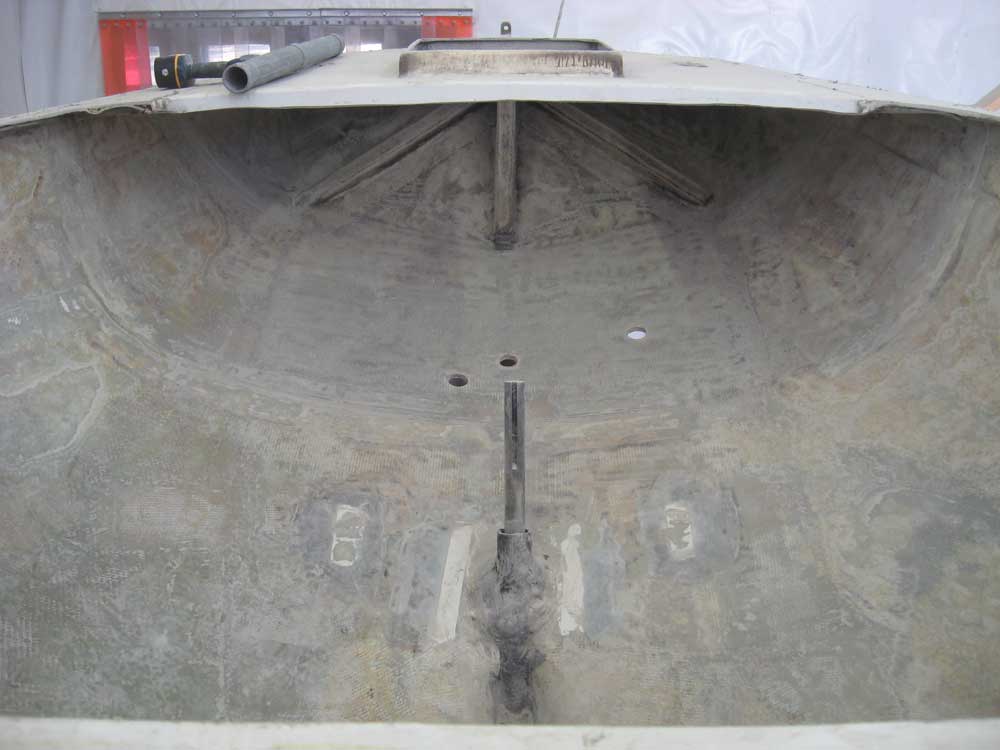
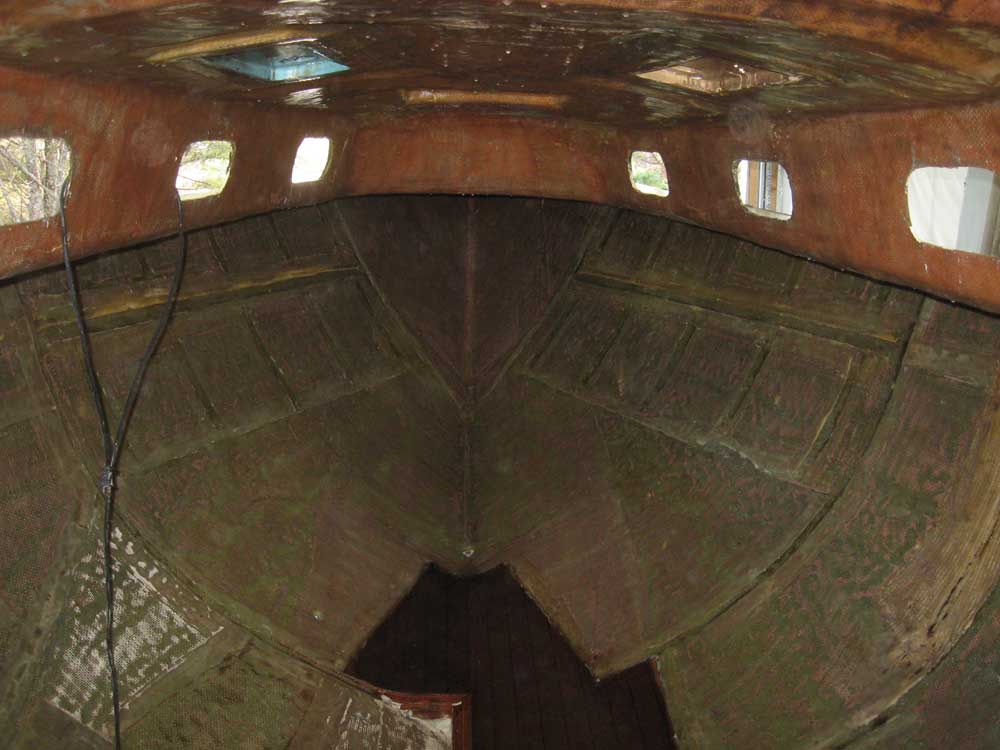
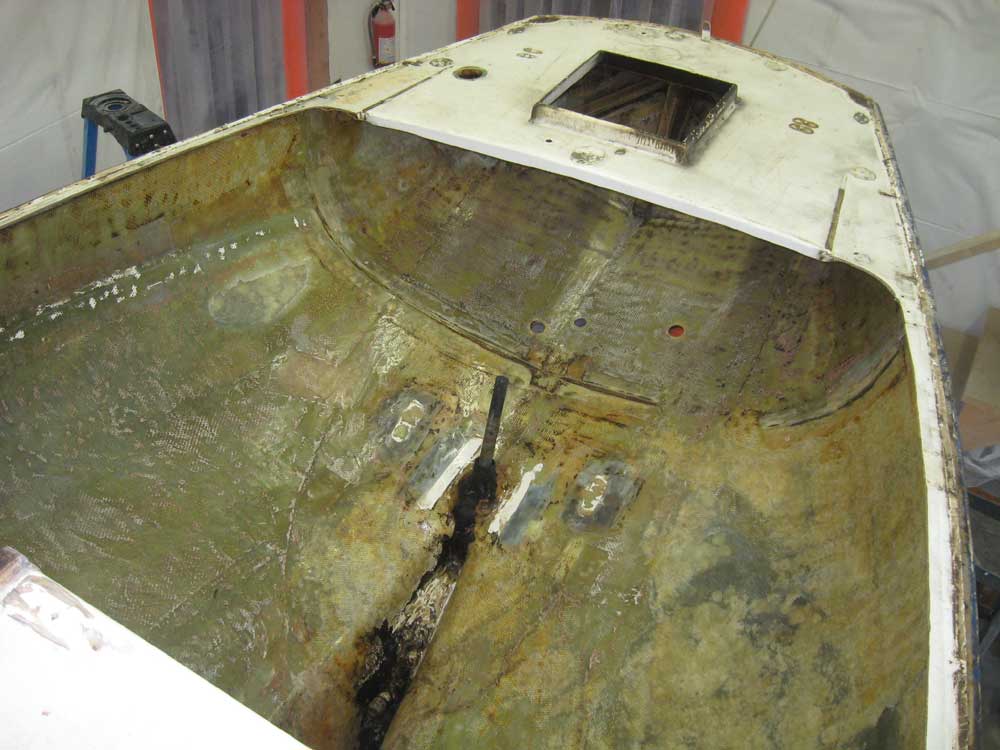
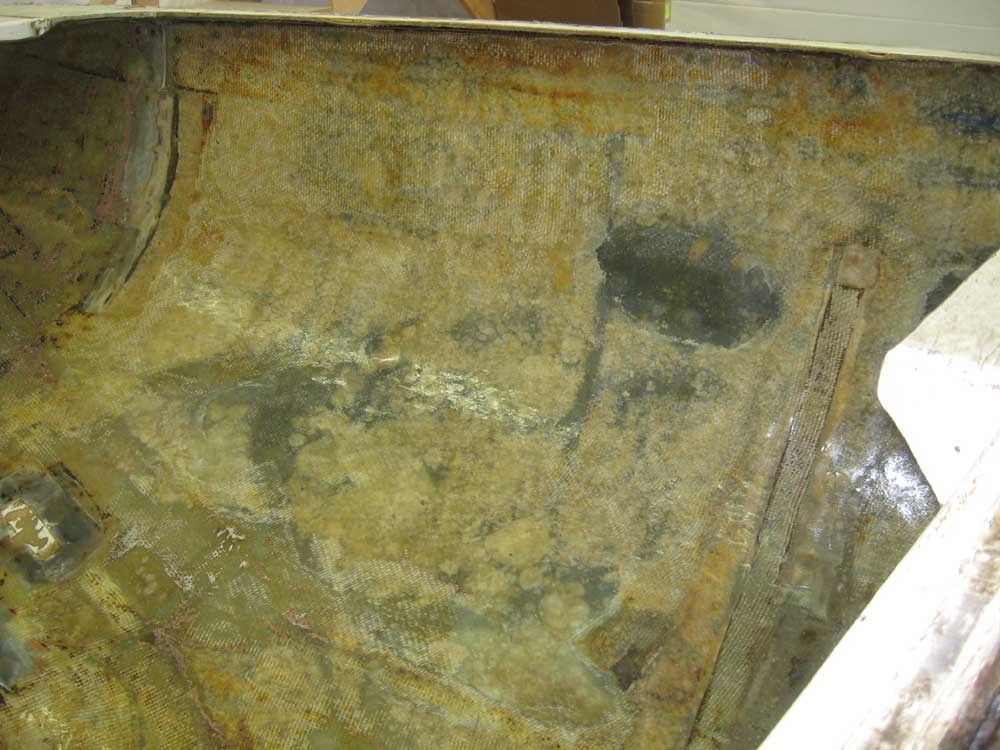
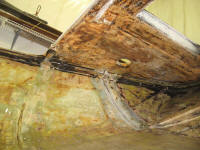
The
overhead of the locker--that is, the underside of the
deck--was black and charred, but fortunately I discovered
that most of the laminate was sound and undamaged.
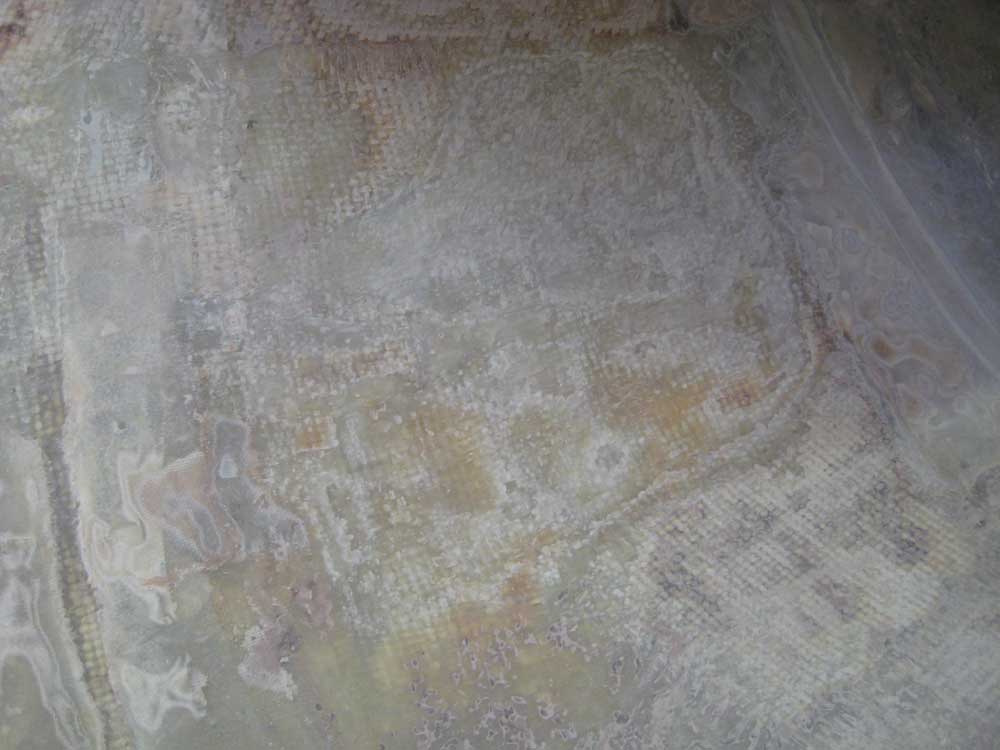
There was a portion of the starboard side where the exposed
layer of roving was completely resin-less and dried out from
the heat, so I ground this away, but I'd feared that more of
the laminate here would be damaged. Every so
often we catch a break.
Grinding the overhead wasn't
too bad. It wasn't too great either, but in short
order that part was done. I moved on to the hull and,
as in all other areas of the boat, ground away smoke and
heat damage, old paint, and the remains of old tabbing as
needed. My little 4-1/2" grinder, which
had been the workhorse of this project so far, was showing
signs of impending death--it grew so hot after relatively
little use this day that eventually I set it aside and
reached for my 7" grinder to finish the job. Normally,
I abhor the use of angle grinders on boats, but in the case
of this project there was simply no better tool for the job.
I used 36 grit angled flap discs for most of the grinding
you have seen on these pages, relying on skill, experience,
and keeping the tool in constant motion to avoid undue
damage. I would not and do not recommend blithe use of
angle grinders, ever.
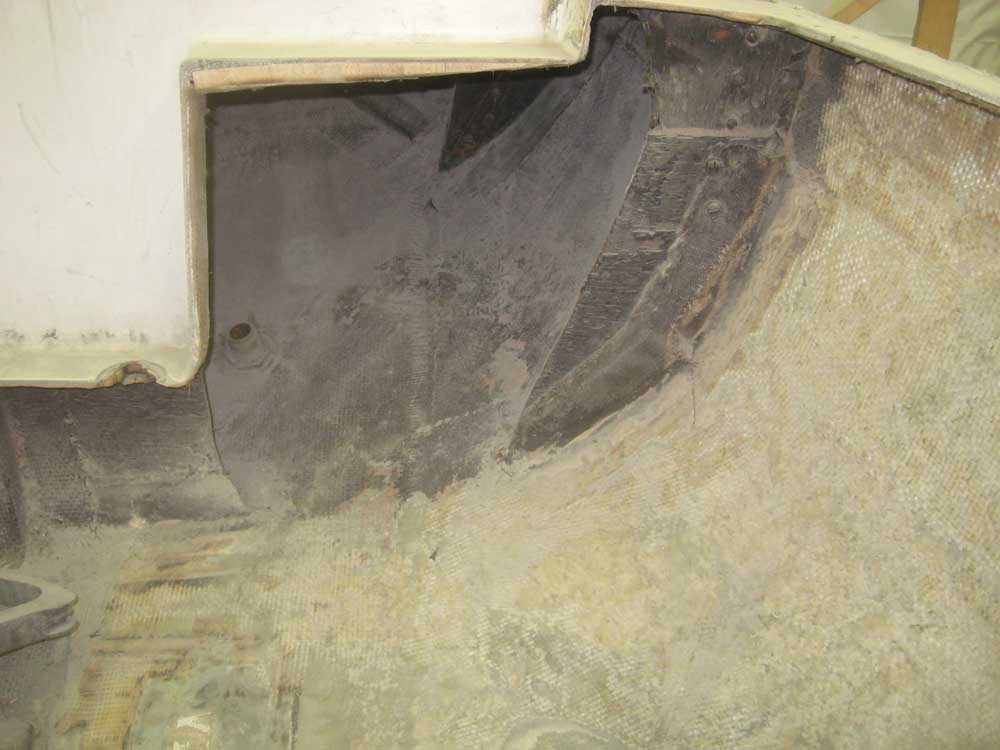
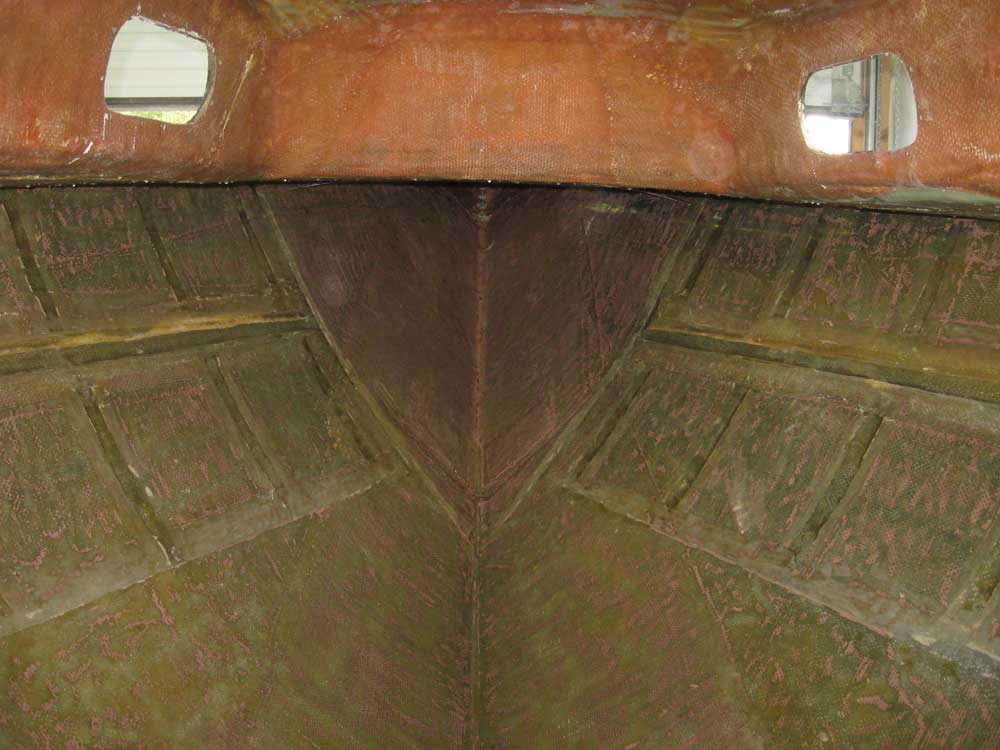
Unfortunately, I discovered a
badly damaged area on the starboard hull, up high near the
underside of the deck. I kept finding dry, resin-less,
and delaminated roving the deeper I ground. There were
other areas like this around the aft end of the boat, but
I'd not previously noticed signs of this level of damage in
this area before; of course, it'd been completely blackened
by soot and hidden behind and beneath the old chainplate
knees, so I guess it was understandable that I'd not seen
it.
Not that it mattered much; my rebuilding
plans would have taken care of it either way. It's not
as if any of the damage here was remotely unexpected. |
 |
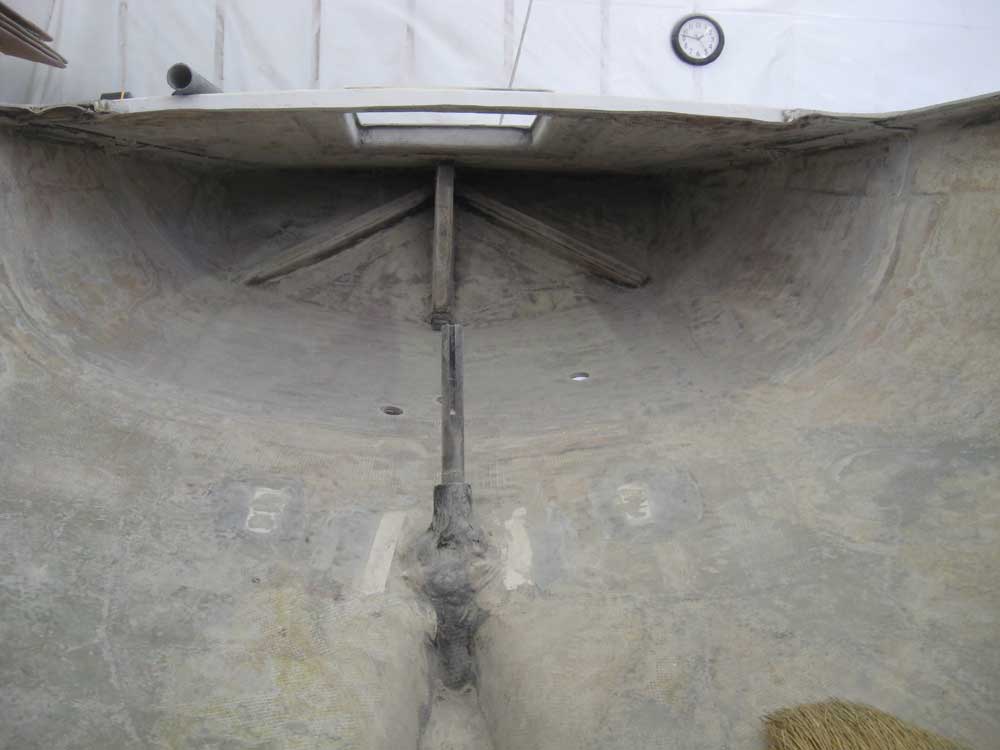
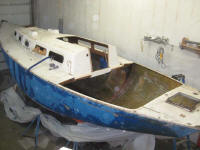
I swept away the worst of the day's dust and debris,
and gratefully closed the chapter on the major interior
demolition/heavy grinding/fire damage-removal portion of the
project. Oh, there'd be plenty of sanding and more
grinding ahead, but really, I felt the worst was behind me.
What a foul few weeks this had been. |
 |
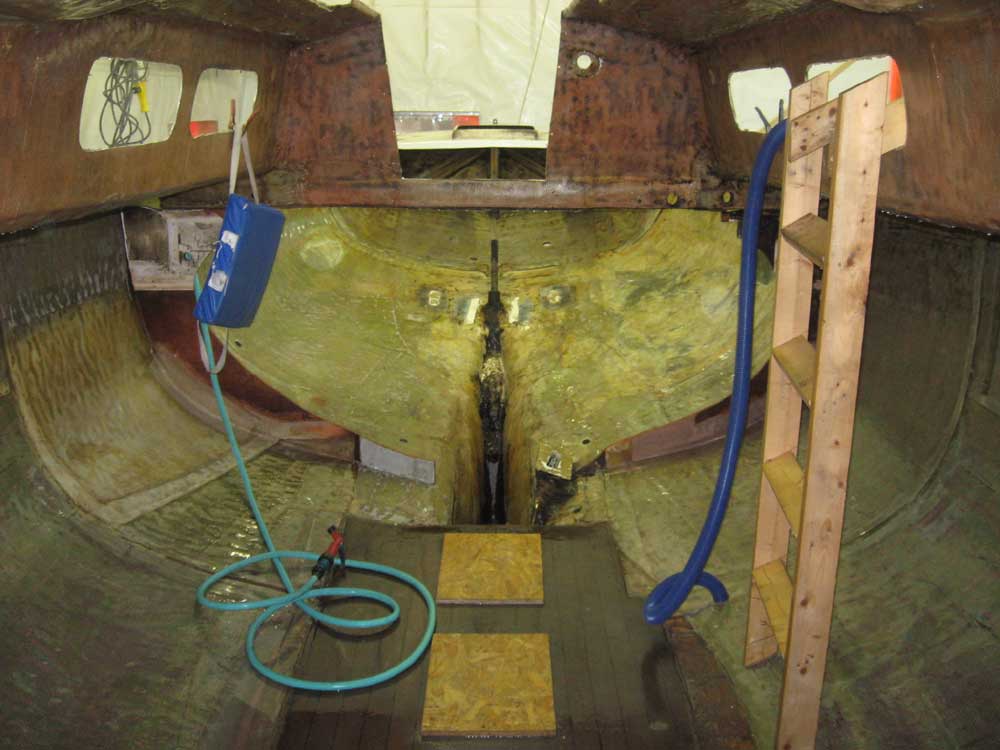
After a lunch break, during which I opened the shop
door to air the place out (it was unseasonably warm once
again this weekend), I returned to wash the boat out.
With the worst grinding out of the way, it seemed a good
time to make a fresh start of things. I'd not spent a
lot of careful time cleaning during the process over the
past weeks; I'd sweep up after each day's and weekend's
work, but this never really rid the boat (or the shop bay)
of the dust. Just walking around the boat would raise
residual dust. I thought a thorough water rinse was
just the ticket, so that I could work on the boat in more
comfort and to also allow me to better judge the situation
at hand.
Before beginning, I removed all the tools
from the boat--it's good to reorganize periodically
anyway--and stowed the various cords, lights, etc. to keep
them away from the water. Then, I hosed off the
interior and, later, the exterior of the boat. This
was satisfying, and afterwards the boat was a much more
pleasant place to be, if still falling short of being
actually pleasant. |


 |
Total Time Today: 6 hours |
Previous |
Next |
|
|