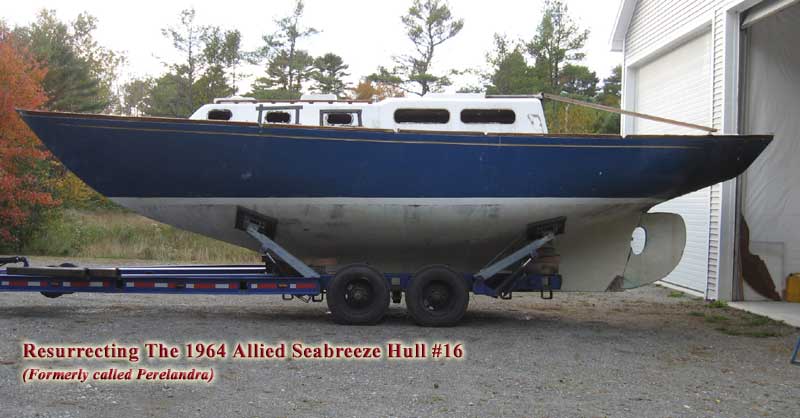
Project Log: Saturday,
December 5, 2009
Home Page >
The Project >
Project Logs > 12/5/09 |
The last remaining area to be
bulk-sanded (my term for the heaviest round of paint removal
and initial grinding) was the deck and cabin trunk. I
was anxious to get this done: partly because it needed
to be done sometime, and now, with all the other sanding
that had been done, was the right time to do it; and partly
because I was plain sick of looking at the old, tired,
black-stained white paint. I always feel better once
I've removed all the old paint.
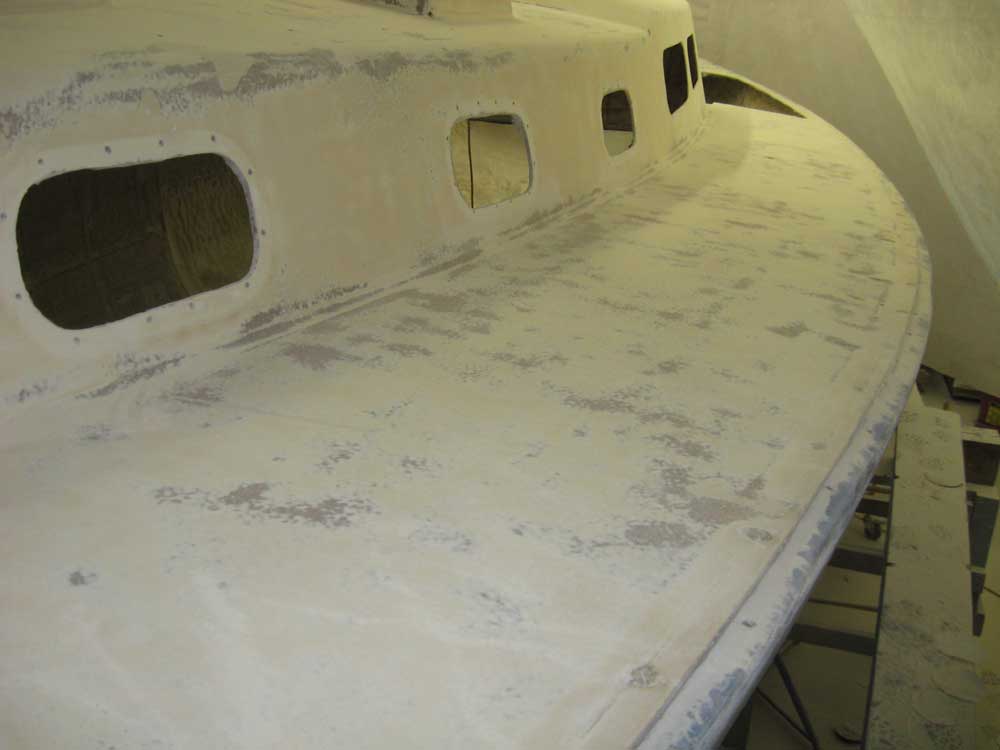
To that end, I spent
the day sanding the decks in order to remove the paint and
vestiges of the old molded nonskid beneath. I used a
right-angle random orbit sander, or DA, equipped with 40
grit cloth-backed PSA discs. After weeks of heavy-duty
interior demolition and fire-damage removal, with its
inherent nastiness, it was almost relaxing to lounge on deck
and simply sand paint and gelcoat away.
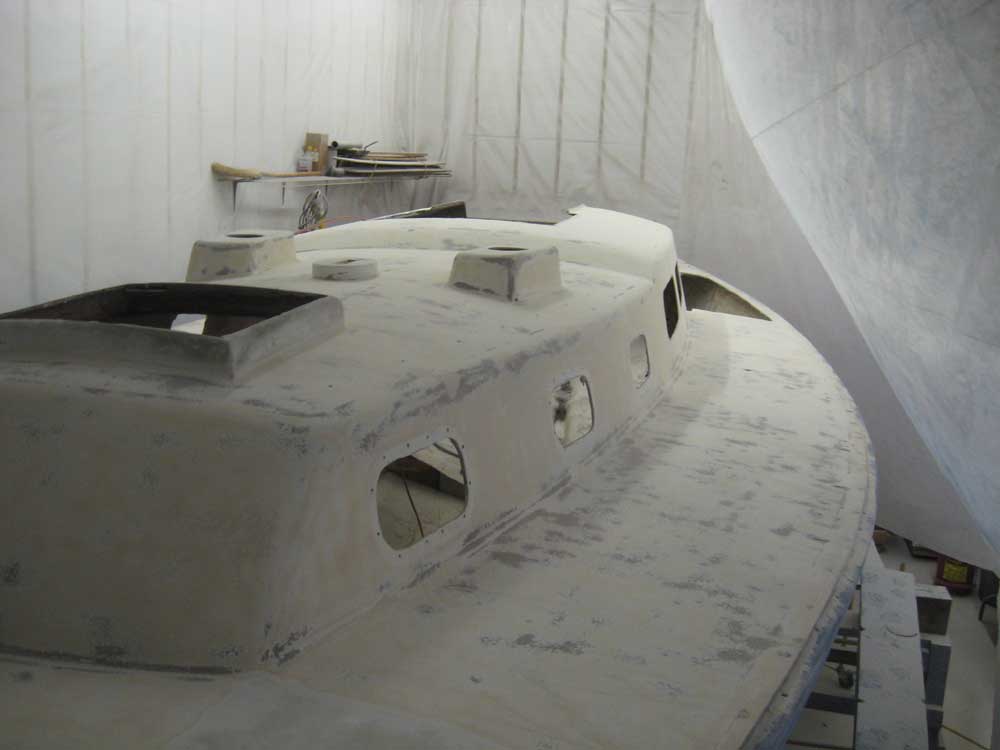
However,
despite the vacation-like atmosphere on deck, I found the
sanding progress to be almost absurdly slow, with the speed
and difficulty compounded by two factors: first, the
existing paint was extremely tenacious and tough; second,
with no internal support, the sanding tended to set up
vibration in the laminate, which vibration works against the
sander's effectiveness. I believed that this was the
main factor that affected what I saw as a poor work output
for the day: a bouncing, vibrating laminate simply
doesn't allow the sander to remain in good contact, and
resists the sanding pressure required to power through
grit-based nonskid and what was clearly 2-part polyurethane
paint.
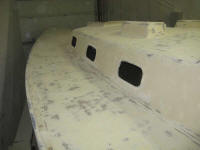
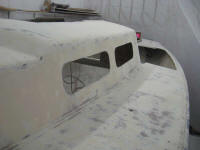
I started on the coach roof, where I knew I'd
not be able to reach from staging. It took half of the
aft, raised portion of the coachroof for me to learn and
adapt the sanding style and technique required for this
particular boat and its conditions; each boat, with
different materials and other conditions, tends to require
its own specific approach to the sanding based on the
performance of the sanding discs. I removed the
painted nonskid (paint with polymeric grit particles mixed
within), underlying polyurethane paint and primer, and, as
needed, sanded smooth any remaining molded nonskid pattern
left over from the original construction.
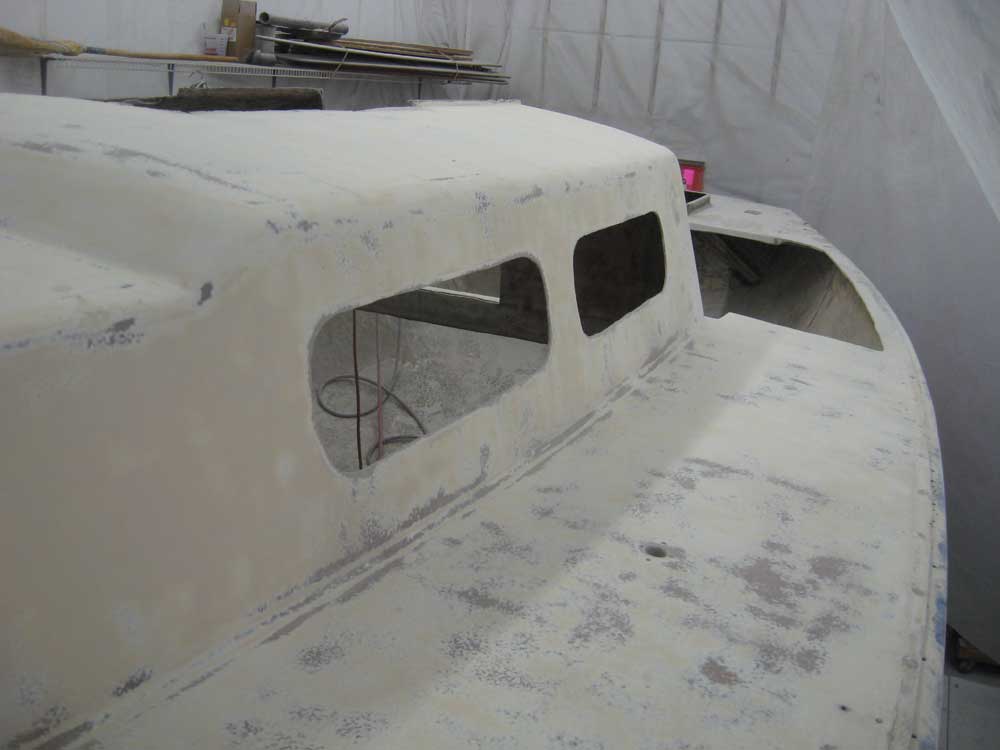
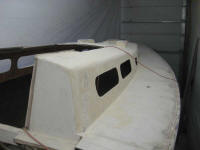
After
completing a the coach roof and a portion of the center of
the foredeck, I set up some temporary staging (I'd not yet
built real project staging for this boat) and began work on
the sidedecks and sides of the cabin trunk. I quickly
found that I couldn't effectively sand the cabin trunk from
the staging, at least not for this stage of paint removal,
so I had to complete that part kneeling on the
sidedecks--not my favorite posture.
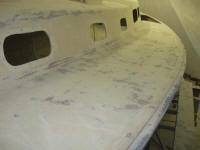
Back on the
staging, I worked my way forward along the port sidedeck,
stopping at the foredeck so that I could move to the other
side and sand the cabin trunk (again from the deck) before
knocking off for the day. I left the starboard
sidedeck and foredeck for tomorrow, disappointed that I'd
not made better progress today.
The original gelcoat
color of the decks was off-white/beige, so there was a clear
change in the boat's appearance. The new look was
ugly, but then so was the old. I preferred the new
ugly, what I termed "progressive ugly", since I can stand
ugly appearances when I feel that forward progress is being
made. As bad as the whole boat looked now, at least
she looked this way because something was happening, which
was a positive thing. |

 |
Total Time Today: 7.5 hours |
Previous |
Next |
|
|